Add true confirmation to the ASP.NET Button control
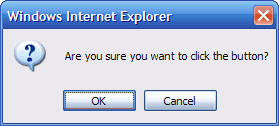
The JavaScript confirm() function is simple to implement on a Button control, but you can only use it for one particular purpose and that is to confirm a postback. Let’s look at an example of this simplicity first and then improve it afterwards. Below is a Button control with an onclick attribute, that opens the confirm dialog. If the user presses the OK button, it will continue with the postback, and if Cancel is pushed nothing will happen.
<asp:Button Runat="server" ID="btnConfirm" Text="Confirm" OnClientClick="return confirm('Are you sure you want to click the button?');" />
This is great for scenarios, where you need the user to confirm an action. So, by using this approach you can either continue to make a postback or you can cancel and not make a postback. Wouldn’t it be cool if you could use it to ask users a question and act depending on their answer from the code-behind?
Let’s say you have a web form with a save button and you would like to ask the user whether or not to send the changes by email to the user after it has been saved. Then, depending on the answer given by the user, you would save the changes and send the email. The confirm trick could not do that, because it would simply not postback if the user pressed the Cancel button and thereby not saving anything at all.
Extending the Button control
What we want is a way to always make the postback and at the same time, know what the user answered to the confirm box. That is not possible unless we extend the Button control and adds an Answer property that hold the information of which button was pushed by the user. An answer can only be OK or Cancel, but let’s call them Yes and No and put them in an enumerator.
The Answer enumerator:
/// <summary>
/// The answers from the confirm box.
/// </summary>
public enum Answer
{
None, // Not answered yet
Yes, // OK button
No // Cancel button
}
We create the ConfirmButton class and derive from the System.Web.UI.WebControls.Button class:
public class ConfirmButton : Button, IPostBackEventHandler
The Answer property of our new ConfirmButton class:
/// <summary>
/// The answer recieved from the confirm box.
/// </summary>
public Answer Answer
{
get { return (Answer)(ViewState["Answer"] ?? Answer.None); }
private set { ViewState["Answer"] = value; }
}
Let’s add another string property called Question that we use as the text in the confirm box.
/// <summary>
/// The question to ask in the confirm box.
/// </summary>
public string Question
{
get { return (string)(ViewState["Question"] ?? string.Empty); }
set { ViewState["Question"] = value; }
}
We then have to override the Render method for our new ConfirmButton control. That’s because we now have to pass the confirm dialog answer to the postback JavaScript that resides in the onclick attribute of the control.
protected override void Render(HtmlTextWriter writer)
{
StringBuilder sb = new StringBuilder();
foreach (string key in this.Attributes.Keys)
{
if (key.ToLowerInvariant() != "onclick")
sb.Append(key + "=\"" + this.Attributes[key] + "\" ");
}
string script = OnClientClick + ";var answer='No'; if (confirm('" + Question.Replace("'", "\\'") + "')){answer='Yes'}";
string onclick = "onclick=\"" + script + ";__doPostBack('" + this.UniqueID + "', answer)" + "\"";
string output = string.Format("<input type=\"button\" {0}name=\"" + this.UniqueID + "\" id=\"{1}\" value=\"{2}\" {3} />", sb.ToString(), UniqueID, Text, onclick);
writer.Write(output);
}
The last thing that needs to be done is to implement the IPostBackEventHandler interface. This enable us to catch the answer passed by the postback JavaScript call and add it to the Answer property of our ConfirmButton class.
void IPostBackEventHandler.RaisePostBackEvent(string eventArgument)
{
this.Answer = (Answer)Enum.Parse(typeof(Answer), eventArgument);
base.OnClick(EventArgs.Empty);
}
That’s it. We created a class derived from the Button class, added some methods and properties and now we have our ConfirmButton class.
Implement it the easy way
Download the entire class below and add ConfirmButton.cs to the App_Code folder and then add the following XML to the web.config’s <system.web> section:
<pages>
<controls>
<add namespace="CustomControls" tagPrefix="cc" />
</controls>
</pages>
When you add the namespace of you’re custom controls to the web.config like this, you don’t have to register the controls on every page they are used.
Example of use
Add a Confirmbutton to your page. Notice the Question property:
<cc:ConfirmButton runat="Server" ID="btnSave" OnClick="btnSave_Click" Text="Save" Question="Do you want to recieve an e-mail with the changes?" />
Then add the ConfirmButton.Click event handler and write logic that makes use of the Answer property:
protected void btnSave_Click(object sender, EventArgs e)
{
SaveForm();
if (btnSave.Answer == Answer.Yes)
{
SendEmail();
}
}
I believe it to be a very simple control to use by just about anybody, because it behaves just like a regular Button with all the events, properties and method that we are familiar with. It just adds the Question and Answer properties.
Download the ConfirmButton class
ConfirmButton.zip (1,06 KB)
Comments
Comments are closed